So What Does It Mean to Onboard Web Design Clients?
Have you ever had a web design project go so smoothly that you wished every project would be just like that? The client was easy to talk to. You were able to get the project started right away, the payments came in immediately. You and the client were in perfect sync, and there was a sense of harmony that made you smile throughout the project. And once the project was completed, the client was so happy that she started referring you to everyone she knew.
This is what building an onboarding process can do for you. It keeps a smooth momentum throughout the project from the beginning to the end. With the onboarding, we are working on the beginning stages of a web design project where we are more interactive with the client collecting information, content, assets, and establishing excellent communication.
In this article, we will focus on building processes and automating onboarding to save time and make the whole process more efficient.
How To Start Building An Onboarding Process
To start, let’s focus on the process. And keep in mind, the first process you build will evolve as you put it into action. All we want to do is begin and get started. There will be systems and templates, and in this article, we will list which ones to start with.
The goal is to automize as much as possible and look where we can save time. Think of everything you do over and over on every project, and find a way to do it just once and reuse for your future projects.
Keep the Momentum Going
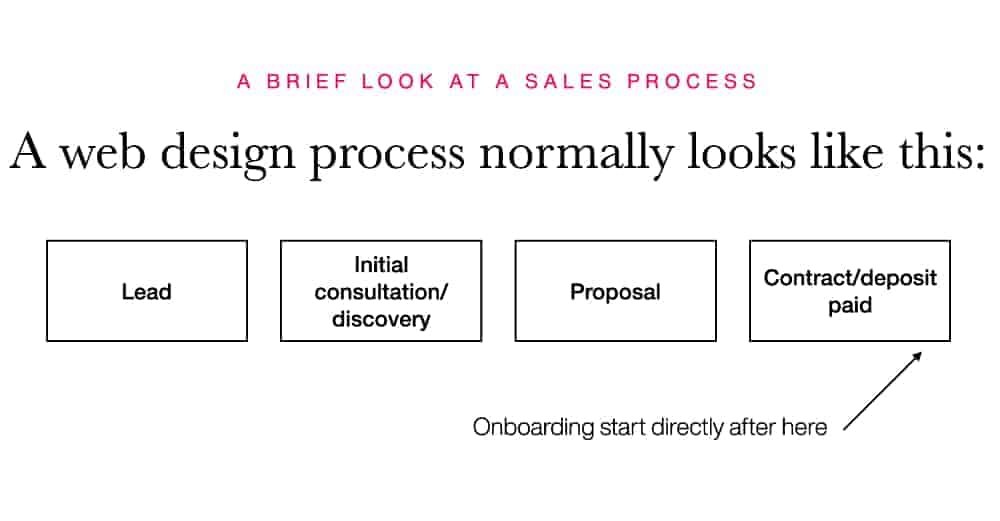
Every project starts with the sales process. This usually looks like:
- Get a new client lead
- Initial consultation/discovery meeting with the client
- Proposal sent
- Contract signed and deposit paid.

The onboarding should happen immediately after the sales process and start right when receiving the first payment or project deposit. By keeping the momentum going, this will kick off your projects in productive flow and right on schedule. Also, this will keep your client motivated and moving forward. Keep in mind, clients are busy. They have their own businesses to run, and if you give too much of an opening, this creates an opportunity for the client to get active on something else, making it difficult for them to be fully present with the project they hired you for.
When we start a web design project, we are going to need a few things to do our jobs. Content, images, logins, assets, etc. The onboarding process will make this easier for your client and keep your project going in a positive direction.
1. Kick-off Meetings
With every new project, it is good to schedule a kick-off meeting, discovery call, or strategy session, where you can review the project and ask all of the questions you need to start your designs.
Here we have an opportunity to create a template outline for that meeting. First, having a framework for a meeting allows the designer to facilitate and make sure the meeting is productive. Since we are making this framework for every new project, let’s make just one and use that same template for every kick-off meeting.
In this kick-off meeting, it is good to review the project, the timeline, your process, and the deliverables. Just to reaffirm expectations and acknowledgment of the scope-of-work. It is also good to prepare the client with what will be needed from them and when (which is right away).
2. Create a Questionnaire Template
Think of all the questions you ask every client and start to list them down. This includes requests for access and logins to accounts needed. WordPress admin logins, FTP, domain access, etc. Collect everything at once and do this with a pre-built questionnaire template. You will save so much time here! No more going back and forth in emails and waiting days for just one login.
Other questions you can ask, for example, favorite websites, about their competitors, or any question about their project, could either be used here or you can ask in your kick-off meeting. Just make sure to write the questions out and add them to either your questionnaire or kick-off meeting templates.
3. Project Management Templates
Every project we get, there is that first day where we start setting up our management tools and file system. First, choose your management tool. We use Trello and Asana, depending on the project. Both work great. And create a blank project starter. This way, when you start a new project, you can just duplicate the project started and be good to go.
The same goes for the file system. These are the files for the client where you store the images, content, notes, projects outline, designs, logos, backups, passwords, etc. You can save time by creating an empty file system that can be duplicated for new projects.
4. Project Road Map Template
In the proposal and contract, there should be an outlined timeline identifying your process for the project. For example, week one is discovery, research, project set up, week two is design, week three is for web development, and so on until the target end date. Now, this is just an example. Define your own timeline for each step in the project and include client updates and check-ins here so you can keep the client updated on your progress and reinforce the schedule making sure the project stays on track.
This could be time-consuming. But if a road map template is built, then you would just need to fill in the gaps. And this timeline could be shared with the client, which helps with expectations.
5. Build a System For Collecting Content and Images
Create your own system!
One of the biggest challenges with onboarding for website projects is content and image collection. So knowing this, by having a working system in place is crucial. There are a few options. Software like Content Snare or Google Forms are great tools to use. Then there’s offering content writing as a service where you can outsource a copywriter, setting timelines, or teaching clients how to add their own content and images after the site is completed.
This takes trial and error. Just find what works best for you and build on that system. Have a process written down and defined, so it is easy to communicate with the client how you will be collecting content and images.
The Benefits of Having an Onboarding System
By starting a process and building a system for onboarding, you will be on the road to automizing your projects and significantly reducing the time by eliminating the tasks you do over and over. Not only will you save time, but your projects will also run smoother for you and the client. You will even start to look and feel more like a professional and not just a freelancer.
Building processes and improving them is a non-stop journey. By starting now and continuously evolving as you go, a year from now, your process is going to fly. The days you spent setting up projects and trying to get information from clients will be cut down for days (or even weeks) into just a few hours. And think of what you can do with all that extra time!
I hope this article helps those just starting off. And please keep in mind, the steps above could be changed as I am also improving on my processes. Find what works best for you, and keep improving on it!


